
Ford Racing Puma - Underbody Restoration
Page 1 of 2 • 1, 2 ![]()

Ford Racing Puma - Underbody Restoration
![]() williamsclio1 Thu Dec 10, 2009 1:35 am
williamsclio1 Thu Dec 10, 2009 1:35 am
At lunch time today I had an hour to burn so decided to make a start on the back box, even tho in the next few days I will be removing it fully to seriously tweak.


After coming across the forum peojectpuma I saw Jacko had started selling short stainless steel bars that fit in the Miltec exhaust to make them look similar to the standard exhaust tip so as that arrived first thing this morning I found 5 mins to fit it, took a little tweaking of the bar but with a gentle tap tap with the hammer all is well,

Personal I think it looks fantastic such a little modification but gives it that standard look. He’s currently selling it on ebay if anyone else is interested.
http://cgi.ebay.co.uk/ford-racing-puma-milltek-exhaust-bar_W0QQitemZ160374628151QQcmdZViewItemQQptZUK_CarsParts_Vehicles_CarParts_SM?hash=item2557129f37
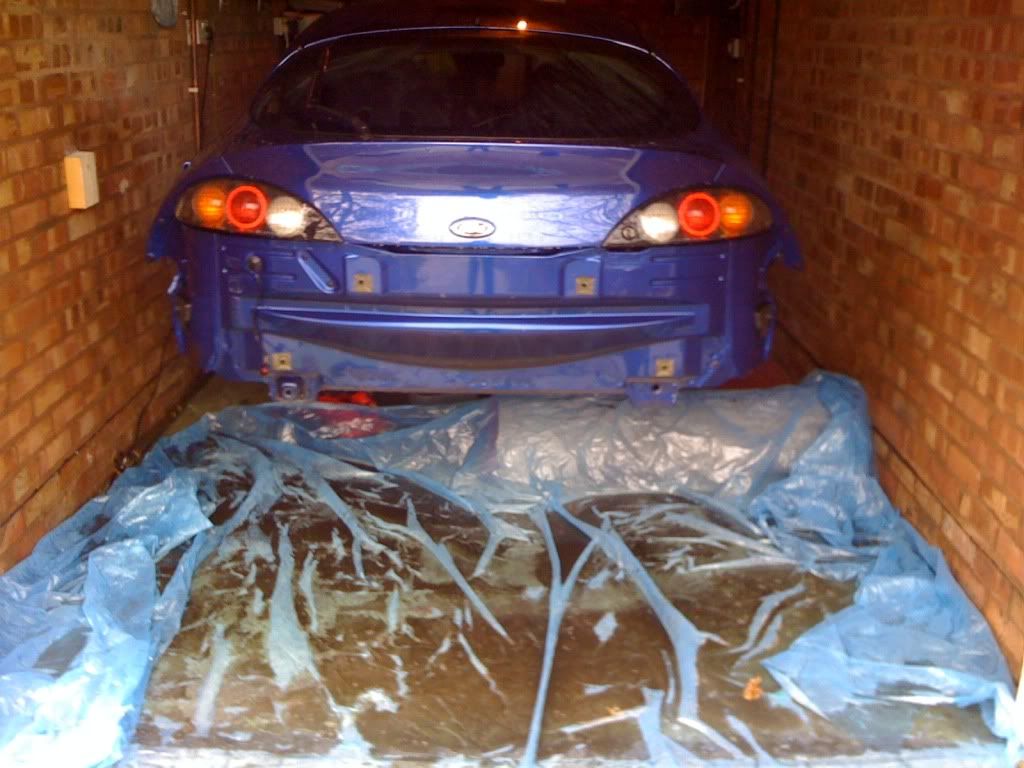
I’m fortunate enough to have a garage but its not much wider and longer than the car so its very tight for moving however once under the car space is not an issue its just getting under the car that’s the problem.

Ok started by jacking up the car and putting under axle stands

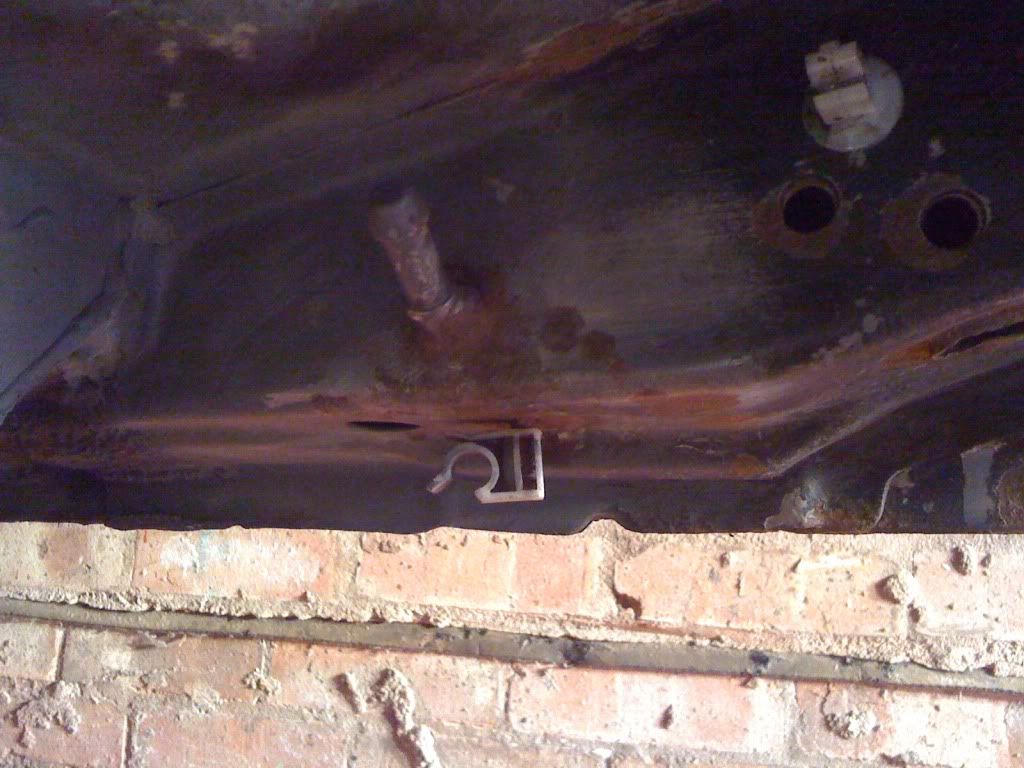
Photos of the rear carriage of the car, the majority of rust is surface however there are areas were its getting worse.


Removed heat shield


Will be replacing as its cracked in the middle and has seen better days.
Photo of the corrosion under the back box heat shield

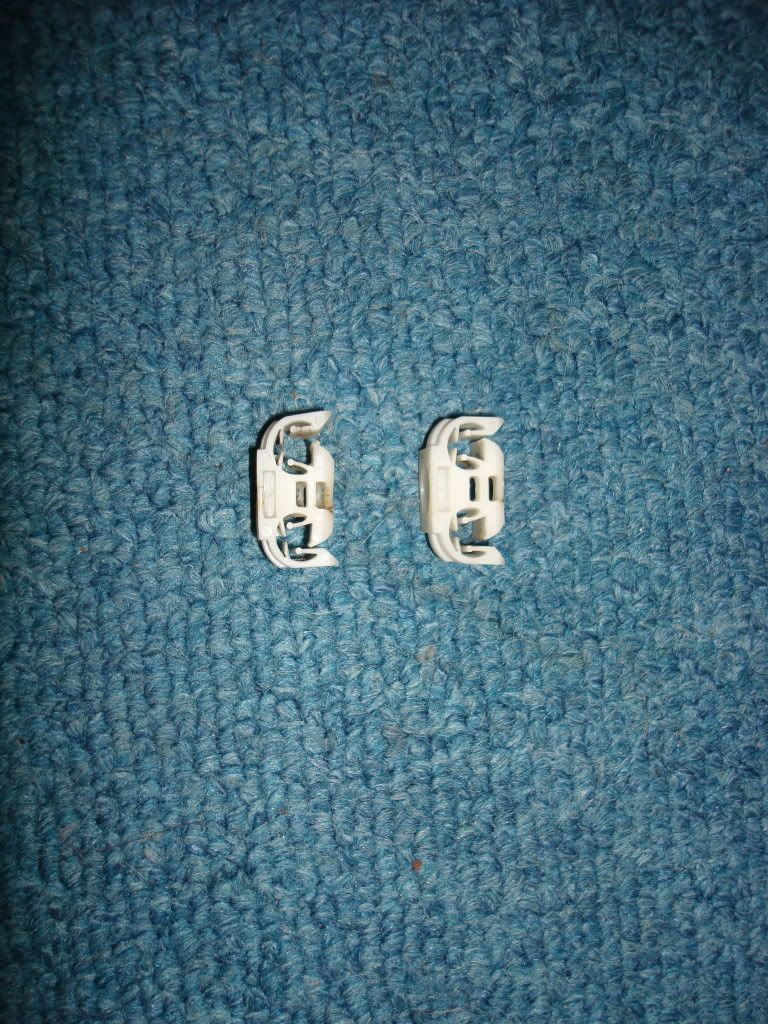
Photo of the two bolts holding the heat shield in place.
Quick tidy up with a wire brush

Cleaned the bolts up and sprayed in satin black.
More to come tomorrow.
Not to sure on what product to use, but going towards smooth finish black hammerite on this section, any arguments against or for?????
All comments welcome
David
williamsclio1- Posts : 34
Join date : 2009-12-10
Re: Ford Racing Puma - Underbody Restoration
![]() williamsclio1 Thu Dec 10, 2009 1:36 am
williamsclio1 Thu Dec 10, 2009 1:36 am
http://www.bilthamber.com/bilthamber-special-offers.php
I intend to paint over the bilthamber with a colour (no colour chosen yet, open to ideas) would hammerite be suitable?
mikeFRP Flashbastd finding your project threds extremely usefull many thanks for that, be prepared for many questions.
Ok quick update, after being to the hospital today for my EEG scan it looks as though i wont be able to drive for a year
Absoultley gutted as only had my licence back for less than year as i was bannded for 9 months for drink driving (TW4T)
So as i cant use the car for a year i have decided that i may as well strip the whole under carriage and really go to town, as well as getting the car to concourse condition over the next 350 days.
Will be having to move the car on to the drive for the extra space for the removal of the rear beam, fuel tank suspension etc.
So first things first i need a car cover.
I know i said i would rather not use my car during the winter but i didnt mean for an entire year
A very gutted David
williamsclio1- Posts : 34
Join date : 2009-12-10
Re: Ford Racing Puma - Underbody Restoration
![]() williamsclio1 Thu Dec 10, 2009 1:37 am
williamsclio1 Thu Dec 10, 2009 1:37 am

http://www.projectpuma.com/viewtopic.php?f=7&t=5858
Got to finish detailing a friends BMW tomorrow so depending on what time i finish will depend on if i get chance to do some more.
David
williamsclio1- Posts : 34
Join date : 2009-12-10
Re: Ford Racing Puma - Underbody Restoration
![]() williamsclio1 Thu Dec 10, 2009 1:37 am
williamsclio1 Thu Dec 10, 2009 1:37 am

and i've had the exchaust in the lounge for the last couple of nights (to the misses delight), spent around 3 hours on it so far, slowly getting there.
So from this:
to this (so far):

Didnt realise my friend who owns the body shop has a sand blaster so will make life so much easier to prepare the hubs etc for painting once i get them removed.
David
williamsclio1- Posts : 34
Join date : 2009-12-10
Re: Ford Racing Puma - Underbody Restoration
![]() williamsclio1 Thu Dec 10, 2009 1:37 am
williamsclio1 Thu Dec 10, 2009 1:37 am
Bit of x factor and a back box

David
williamsclio1- Posts : 34
Join date : 2009-12-10
Re: Ford Racing Puma - Underbody Restoration
![]() williamsclio1 Thu Dec 10, 2009 1:38 am
williamsclio1 Thu Dec 10, 2009 1:38 am
carried on stripping the underside but wont update pictures untill a large section is complete and ready for primer etc
Been a busy week but hoping to get lots done over the weekend.


when I started the car to move it out the garage I forgot the back box wasn't on WOW loud noises
Now I know all cars sound stupidly loud with the back box missing but Jesus what a noise the FRP makes.
David
williamsclio1- Posts : 34
Join date : 2009-12-10
Re: Ford Racing Puma - Underbody Restoration
![]() williamsclio1 Thu Dec 10, 2009 1:38 am
williamsclio1 Thu Dec 10, 2009 1:38 am
Managed to clear the garage out today, there was a running machine, loads of old carpet, underlay and loads of boxes at the front of the garage, so found space in the shed for the boxes carpet etc and put the running machine in the spare bedroom.
By moving all of the above I managed to move the car another 2 foot further in to the garage so now I can leave it jacked up and not have to lower it to close the garage door. Result

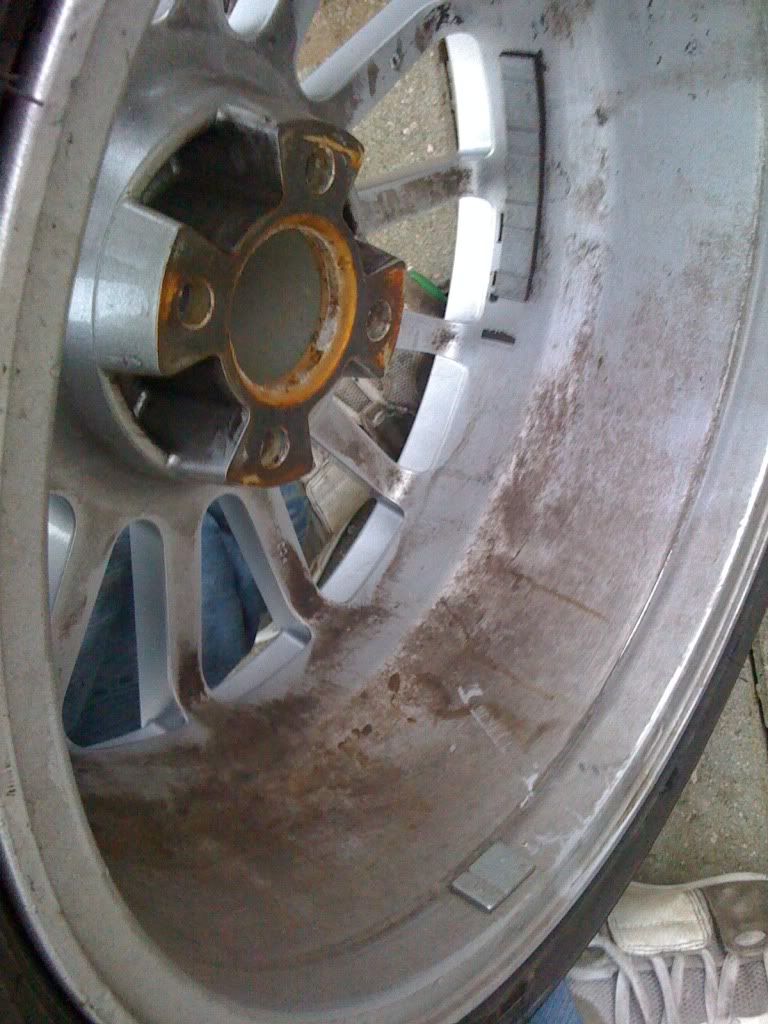
So now the car can stay up on the jacks I took the wheels off and started to clean the wheels, which gave me a chance to final use my new power hose purchase and poor boys wheel sealant.
No before photos but they were pretty filthy on the inside but nothing the cherry wheel cleaner, Maguire’s brush couldn’t shift.
Hoping to finish off the other wheel tomorrow and may remove the rear beam etc (time permitting).

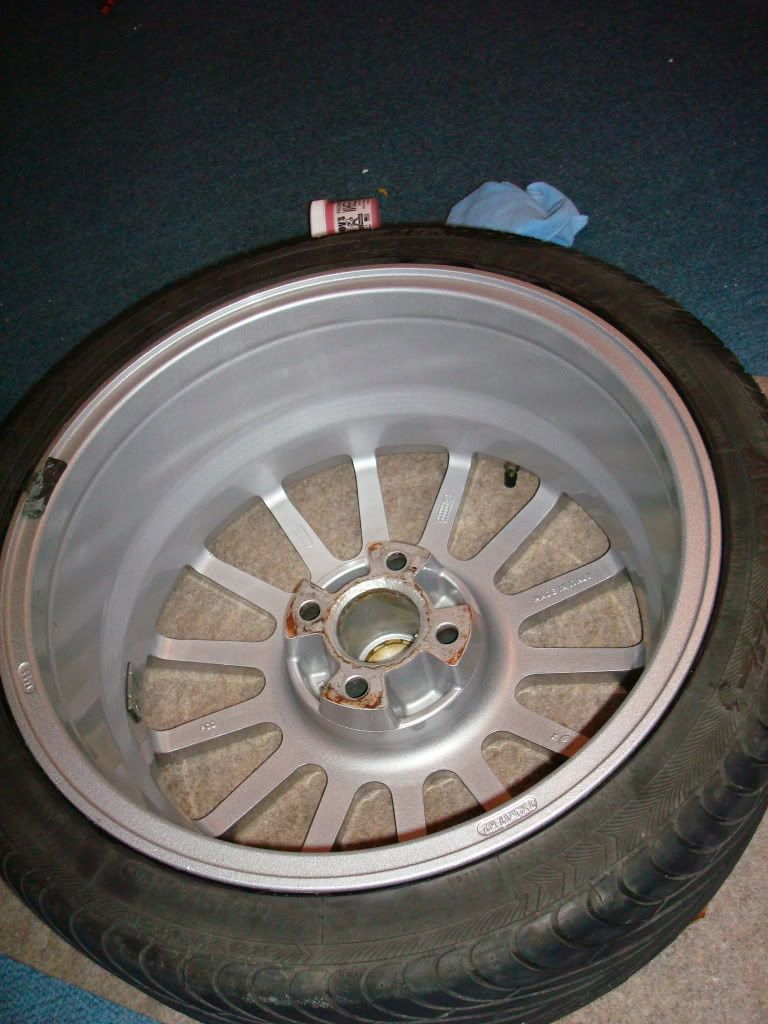

Got a replacement centre cap for this wheel as i sprayed TFL on the wheel a while back and didn't rinse it off properly and it stained the cap
Plus the dreaded xfactor was on again so was another chance to rope the misses in to another couple of hours on the back bax, half a tub of Meguires NXT metal gone

David
williamsclio1- Posts : 34
Join date : 2009-12-10
Re: Ford Racing Puma - Underbody Restoration
![]() williamsclio1 Thu Dec 10, 2009 1:39 am
williamsclio1 Thu Dec 10, 2009 1:39 am
Finished off cleaning the second wheel and applied poor boys wheel sealant.


Put with other in the garage with some bubble wrap over them.

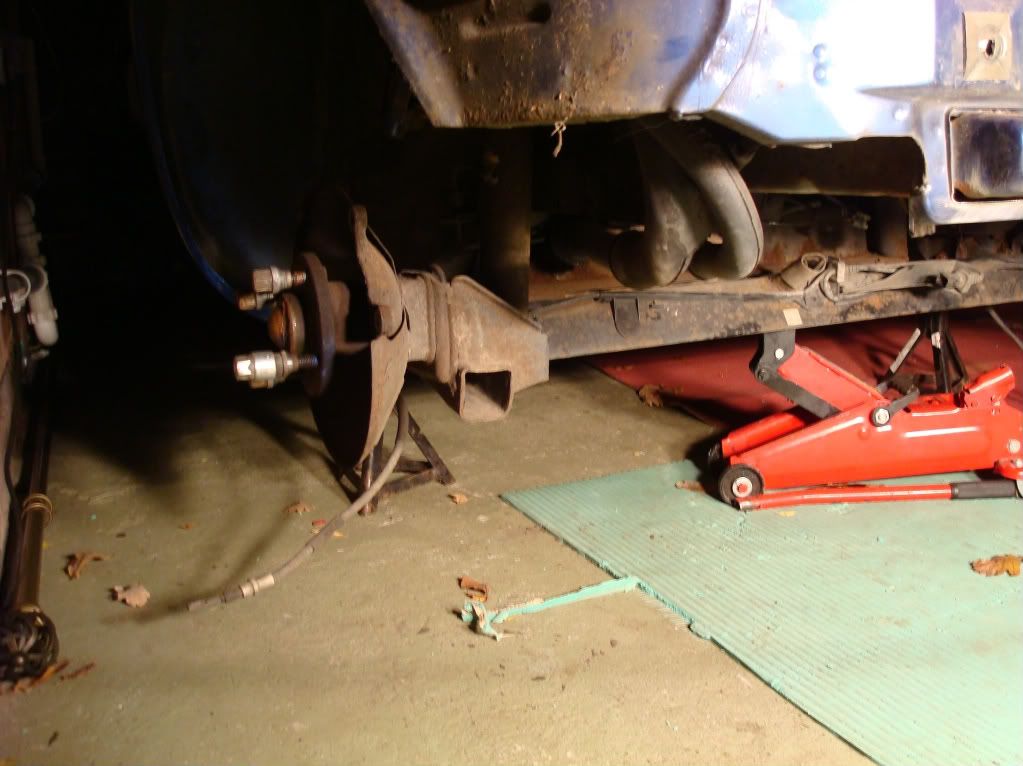
Started to remove the rear beam, managed to remove the two brake callipers, discs and the bolts holding the suspension arms on, but due to my limited tools I couldn't undo the following rear beam bolts,

very frustrating as would have been nice to taken it fully off this evening, hopefully friend popping over tomorrow night with the extra sockets etc that I need.
Spent another 20 mins with the wire wheel brush attached to the drill.
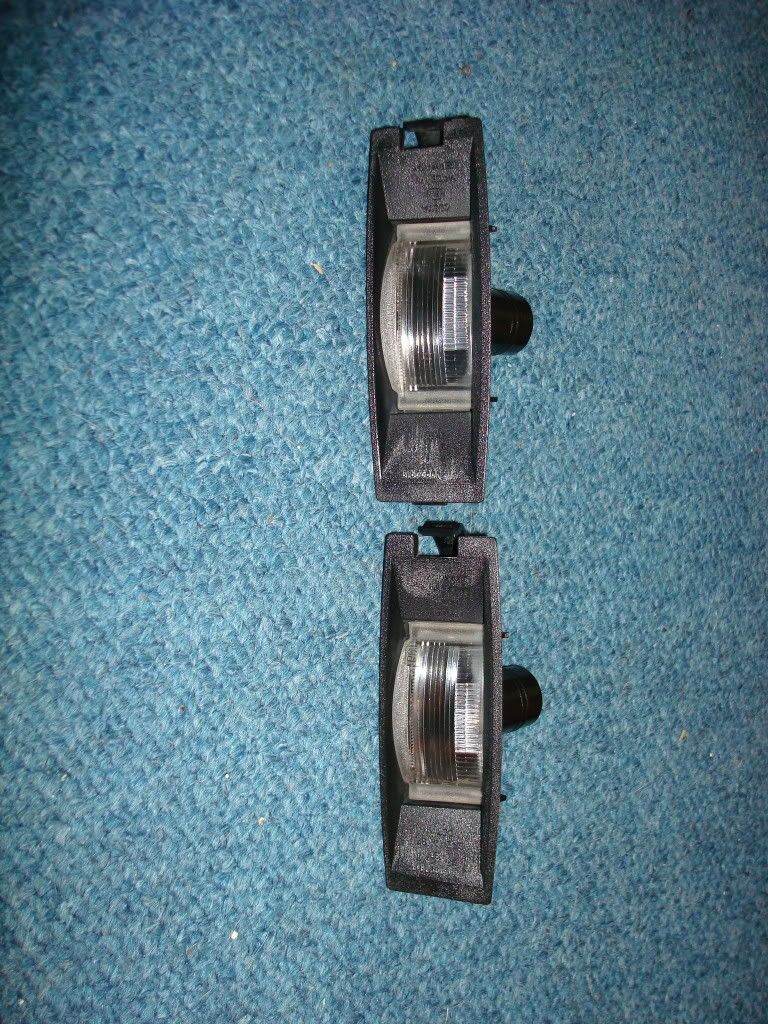
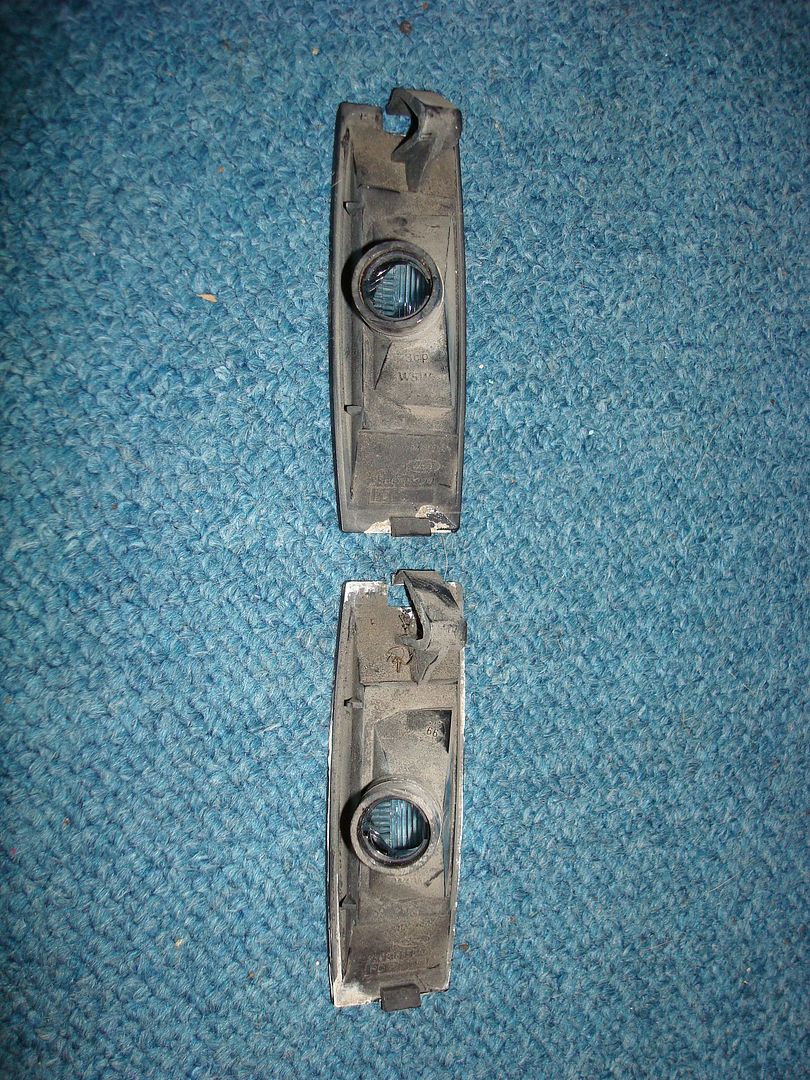
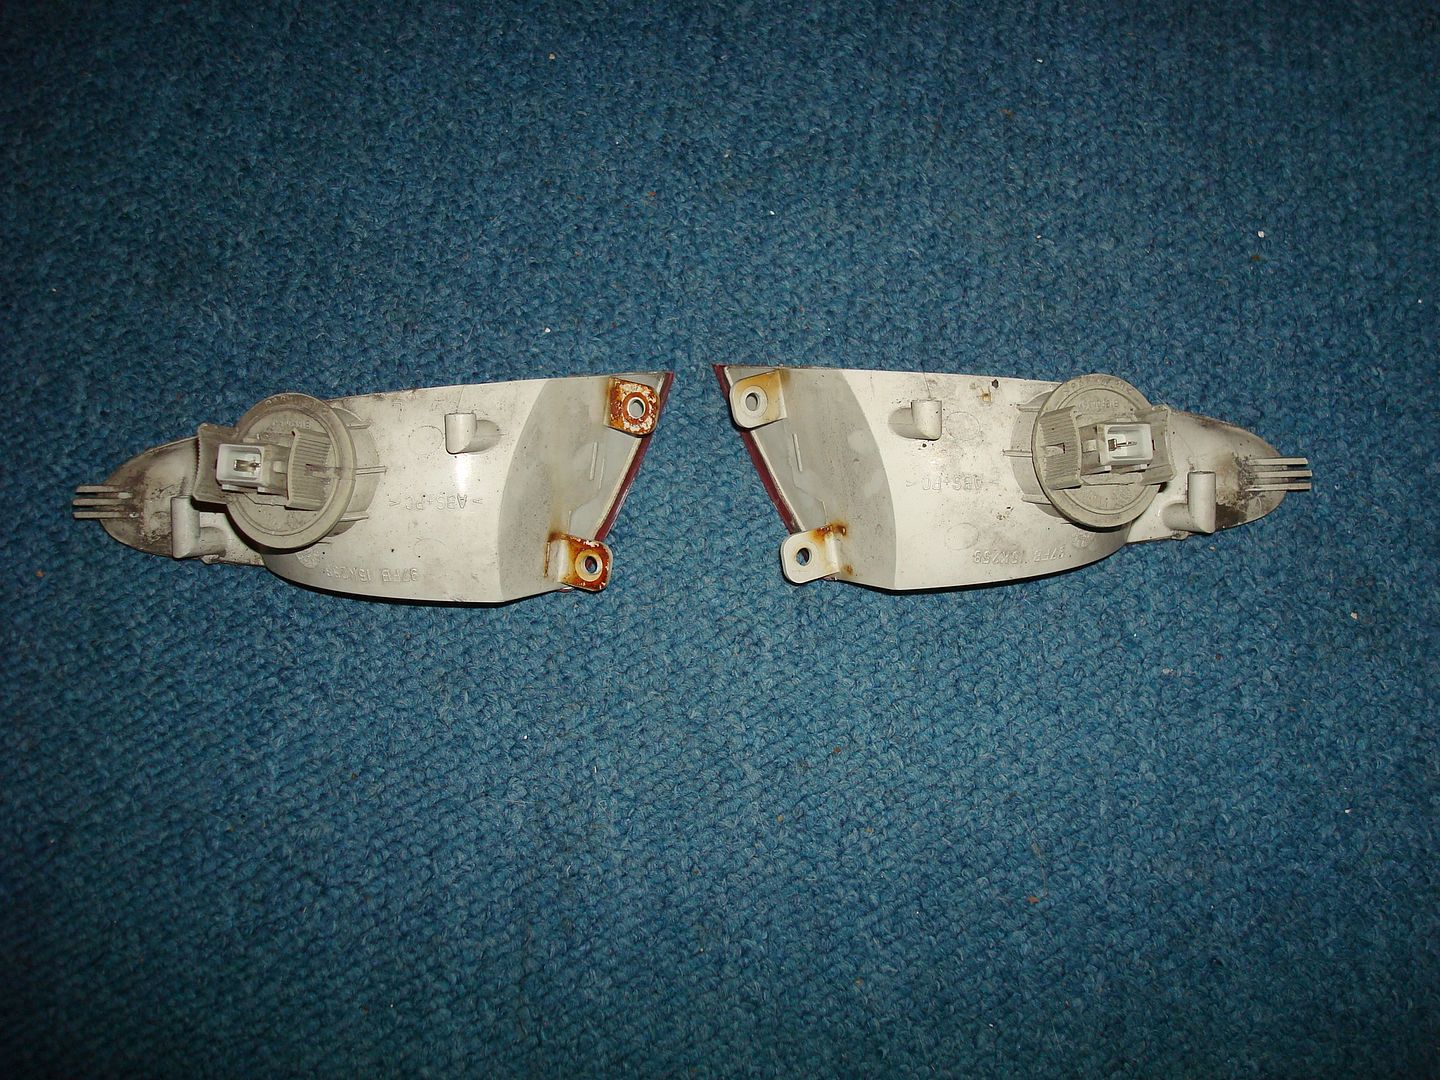
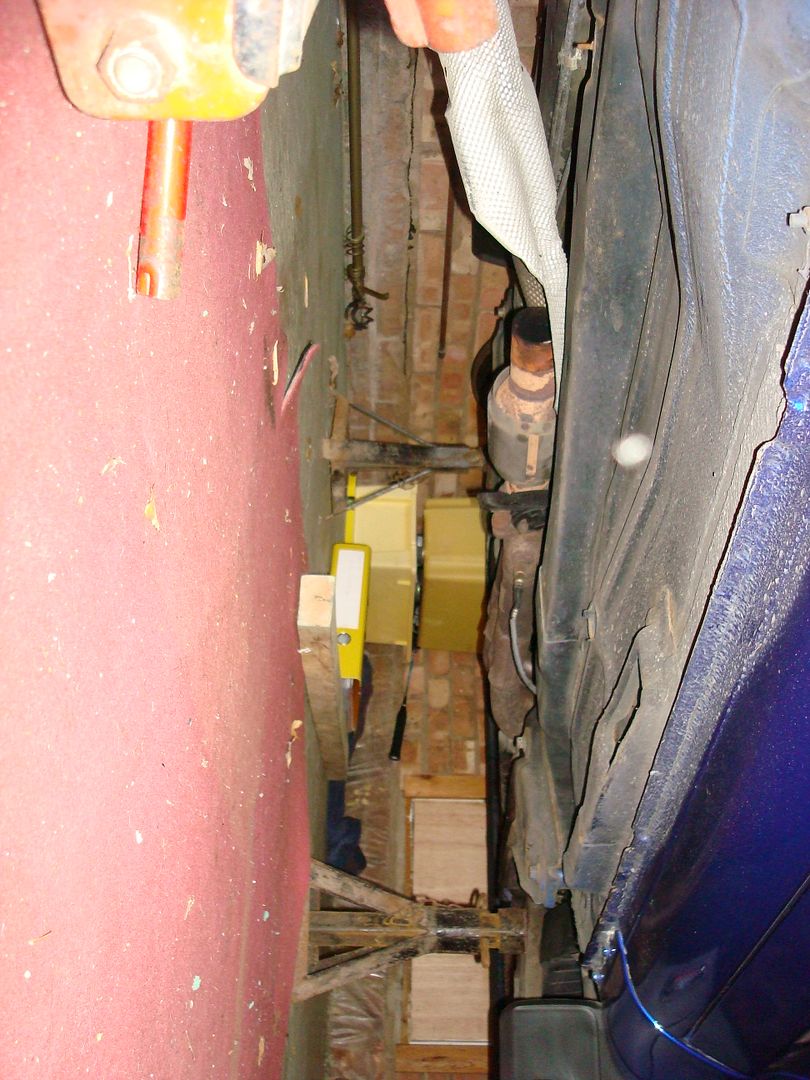
Few random shots


I’m slowly realising quite how much is involved with this project but as I have a year ahead of me to do it I’m no rush and enjoying each time I have some time to work on it.
Right almost time for another hour on the back box
David
williamsclio1- Posts : 34
Join date : 2009-12-10
Re: Ford Racing Puma - Underbody Restoration
![]() williamsclio1 Thu Dec 10, 2009 1:39 am
williamsclio1 Thu Dec 10, 2009 1:39 am
OK managed to have a good giggle with a few mates tonight whilst trying to remove the rear beam and fuel tank, it was the first time for all of us so was quite a learning curve
had one of the rear beam bolts rounded on us
So first off the centre section removed and another heat shield.


Rear beam removed after a good half an hour fighting the bolt

OK ready for the fuel tank removal

Would like to note there was only an 1/8 of a tank of fuel left however just so you know that’s still quite a lot lol
So after some fiddling we got it off whilst the two pipes that go in to the top were dripping on the floor.


Think the fuel got to us a bit as we found the name of the pump highly amusing

And finally just a random shot of the arch, think I’ll be starting on this tomorrow evening.

David
williamsclio1- Posts : 34
Join date : 2009-12-10
Re: Ford Racing Puma - Underbody Restoration
![]() williamsclio1 Thu Dec 10, 2009 1:40 am
williamsclio1 Thu Dec 10, 2009 1:40 am


She though I was going to hate it, but I think its fantastic.
David
williamsclio1- Posts : 34
Join date : 2009-12-10
Re: Ford Racing Puma - Underbody Restoration
![]() williamsclio1 Thu Dec 10, 2009 1:41 am
williamsclio1 Thu Dec 10, 2009 1:41 am
Final removed the rest of the rear end, callipers, suspension, fuel black box and the fuel pipe the whole area now ready for stripping.


You can see that the rear brake lines are still attached as I’m waiting for the brake fluid to empty before removing.
To remove the suspension I had to gain access to the top nut in the boot so decided to remove the carpets etc (something else to tweak indoors)

Now everything has been removed I can assess the rust, it appears a little worse than I was hoping but nothing to major, I should hopefully be able to rectify without to much hassle.


As I haven’t taken on a task to this scale before I thought it would be worth taking note of were everything came from

After some web searching today I’ve found a local electro plating company
http://www.trentonelectroplating.co.uk/why-use-trenton-electroplating.php
and after a quick call to the owner he has told me it will cost in the region of £25 to have all my bolts, nuts etc plating in zinc.
David
williamsclio1- Posts : 34
Join date : 2009-12-10
Re: Ford Racing Puma - Underbody Restoration
![]() williamsclio1 Thu Dec 10, 2009 1:41 am
williamsclio1 Thu Dec 10, 2009 1:41 am
Went out last night and had a few drinks so didn’t manage to get a lot done today, had planned on getting the suspension taken apart and the rear beam but didn’t get to mates garage before he closed.
Got the power hose out and spent half an hour cleaning up some replacement second hand inner front arch liners I bought a month ago. Come up really well. Will compare to the front two once removed and then replace with the best ones.
Unfortunately the camera wasn’t charged so poo photos as taken with the iPhone

Also jet washed the fuel tube.


Used some cheap plastic cleaner and has come up like new.


Removed the metal bit from the top of the fuel pipe as will send this away for zinc plating with the rest of the bolts.

(RPOC & PROJECT PUMA)
Does anyone know the Ford order code for the rear brake lines?

David
williamsclio1- Posts : 34
Join date : 2009-12-10
Re: Ford Racing Puma - Underbody Restoration
![]() williamsclio1 Thu Dec 10, 2009 1:41 am
williamsclio1 Thu Dec 10, 2009 1:41 am
Cant help myself


David
williamsclio1- Posts : 34
Join date : 2009-12-10
Re: Ford Racing Puma - Underbody Restoration
![]() williamsclio1 Thu Dec 10, 2009 1:42 am
williamsclio1 Thu Dec 10, 2009 1:42 am
Not really done alot today. To much football


Looking forward to Tuesday as taking rear beam etc to powder coaters
David
williamsclio1- Posts : 34
Join date : 2009-12-10
Re: Ford Racing Puma - Underbody Restoration
![]() williamsclio1 Thu Dec 10, 2009 1:42 am
williamsclio1 Thu Dec 10, 2009 1:42 am
Ok brake lines removed, however my lack of experience showing again here,
Please can someone tell me how to remove the hose section to the brake calliper?

Trying to get it removed to give it a tidy up, as had original planned on replacing but new ones £70+ and I think I can get these looking pretty much new.
Lines in the lounge ready for a clean up, getting some Jenolite rust remover for the nuts on the ends as they have seen better days.

Also taking the rear beam and tank etc to powder coaters tomorrow and I would like to get the rear callipers shot blasted and powder coated in silver.
First of all is this something that anyone has had done before and if so should I strip them down? (ie ever nut and bolt?)

Also should I cover the holes up, advice required please.
And should I be looking to remove this? If so how as cant get it to budge.

David
williamsclio1- Posts : 34
Join date : 2009-12-10
Re: Ford Racing Puma - Underbody Restoration
![]() williamsclio1 Thu Dec 10, 2009 1:43 am
williamsclio1 Thu Dec 10, 2009 1:43 am
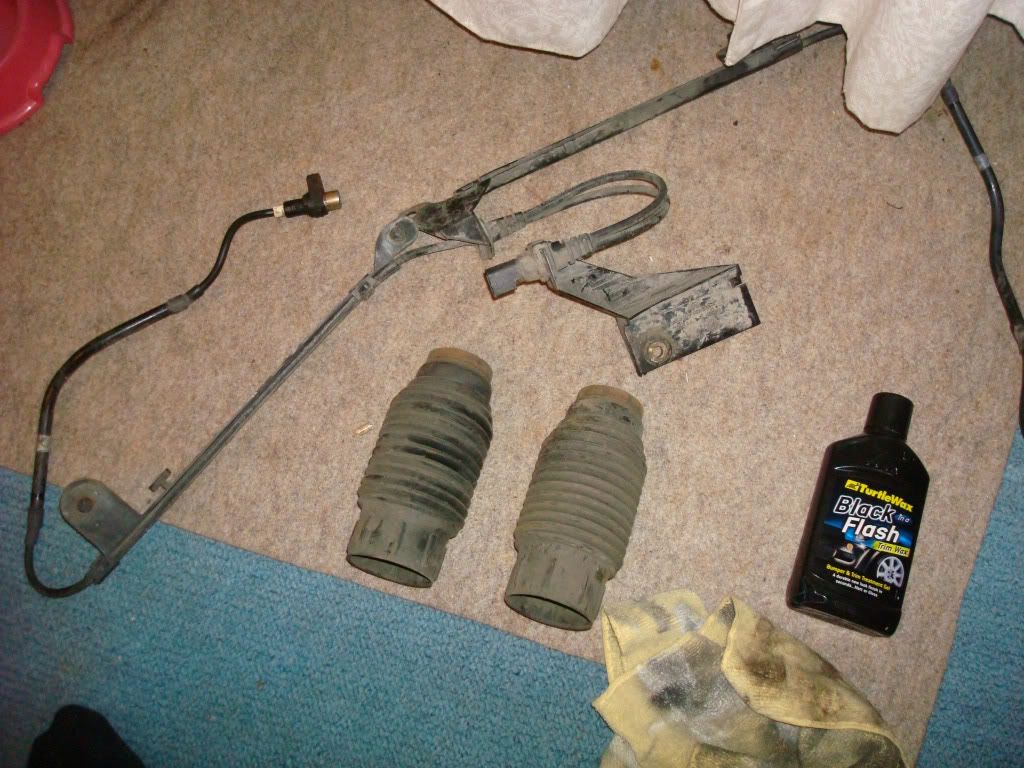
Ok managed to achieve a lot today, got up early (ish) and removed the last part of the brake line (thanks to Flash for instruction)

Also decided to power hose the rear arches in preparation for stripping back:
Placed large plastic sheet on the garage floor to stop the floor getting covered in water sprayed the arches with engine bay cleaner and left for 5 mins before attacking with the power hose.

A lot of dirt still left tucked away in the upper arches as can be seen on the sheet after the wash.
Took pump out of fuel tank and tipped the rest of the remaining fuel in to friend’s car.

Spent some time on the rear arches with the angle grinder to try and remove the rusted areas, not finished as yet but made a good start.
Before:

After:

Random Arch:


Took rear beam down to friends garage so he could take them apart.


However he told me that there is no way he could remove the rear ABS sensors without braking them so before he did, he told me it would be worth getting a price on a replacement one wait for it ………………………… £118 plus the VAT
So for now he has taken it apart but hasn’t taken out the ABS sensor (therefore all the parts linked together), until I decided what to do about it. Rang Puma Build spoke to a very helpful employ who explained to me in all the years he has worked on the Racing Puma he has only ever got one off without it breaking.
So the options:
1. Remove the old one so all the parts can be taken to shot blasters and powder coaters and replace the ABS sensor even though the one on the beam works (at a cost of £118+)
2. See if the shot blasters and powder coaters can work round the problem with leaving the sensor attached. (Unlikely but worth asking)
Whilst there he took the springs off the suspension so now there ready for powder coaters. As for the damper I’ll have to clean this up by hand as been told cannot be shot blasted.

Whilst there I got his other half to order me some seam sealer in.
Decided to go to Halfrauds for some bits and bobs.
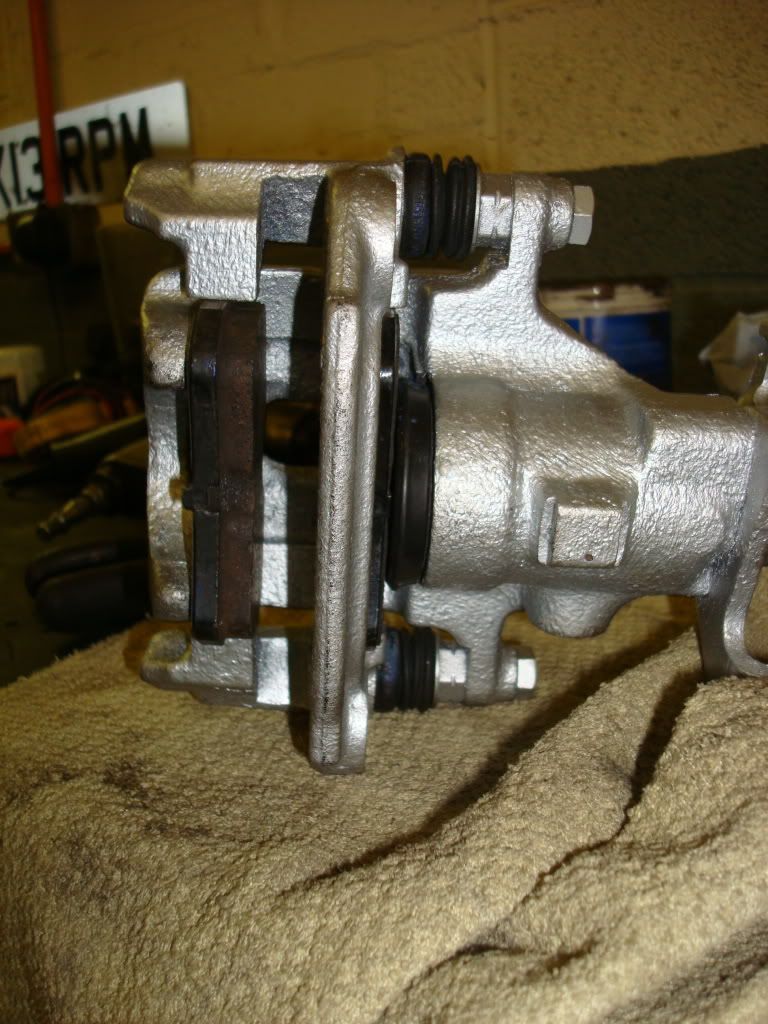
Got back and attacked the rear callipers with some paint stripper, worked pretty well but still took some good old elbow grease to get them ready for painting.


Only painted part of the calliper so far, but adding layers to the main part over the course of the evening.

Whilst at Halfrauds I bought some

I have put all my bolts, rear discs etc in the bucket for the night hoping to remove the majority of the rust in preparation for the zinc plating.

David
williamsclio1- Posts : 34
Join date : 2009-12-10
Re: Ford Racing Puma - Underbody Restoration
![]() williamsclio1 Thu Dec 10, 2009 1:44 am
williamsclio1 Thu Dec 10, 2009 1:44 am
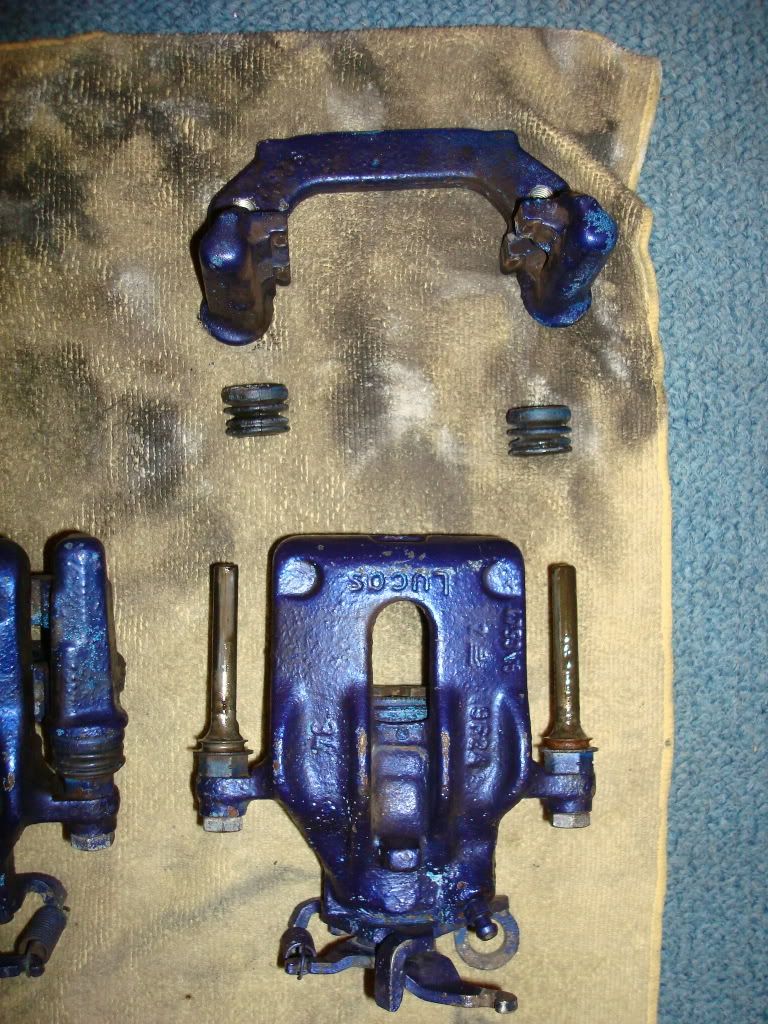
Finished of spraying the rear callipers, really happy with the results
During:


Afters:

David
williamsclio1- Posts : 34
Join date : 2009-12-10
Re: Ford Racing Puma - Underbody Restoration
![]() williamsclio1 Thu Dec 10, 2009 1:44 am
williamsclio1 Thu Dec 10, 2009 1:44 am
Took brake discs out of the bucket and surface rust has all been removed
All other bolts and nuts etc looking pretty good as well however leaving them in for at least another 24 hours as some of them still a bit rusty. Thumbs up for the hammerite rust remover, I did think to myself how effective could it actually be putting already rusty nuts etc into a bucket of water, however true to its name its certainly done the trick.
This is the discs after being taken out of the bucket and dried off.

Both masked up for spraying.

After photos


Another part stored in the kitchen ready to be put back on.
David
williamsclio1- Posts : 34
Join date : 2009-12-10
Re: Ford Racing Puma - Underbody Restoration
![]() williamsclio1 Thu Dec 10, 2009 1:45 am
williamsclio1 Thu Dec 10, 2009 1:45 am
Ok saving the pennies all over the place, picture of the hand brake cable plastic brackets and brake line holders.
I've put the hand brake cable brackets in to the bucket to try and remove the rust stains, not sure if the replaement hand brake cable im getting will have replacement ones but we'll see.

Cleaned up the brake brackets with good old WD40 and a old toothbrush.
David
williamsclio1- Posts : 34
Join date : 2009-12-10
Re: Ford Racing Puma - Underbody Restoration
![]() williamsclio1 Thu Dec 10, 2009 1:45 am
williamsclio1 Thu Dec 10, 2009 1:45 am
Little update, my order of Hammerite rust gel arrived today, cheap ebay purchase going to apply the two pots to the two worst effected areas tomorrow night hopefully should remove the majority of the rust and save me time with the wire brushes etc. Theres was some Jenolite going for a £2 so i thought i would give it a try on some of the less effected areas.

In the tub wrapped in cling film are the nuts and bolts with some of the liquid Hammerite rust remover out of the bucket. Friend popped over earlier as he's taking them to the place he gets his metal treated. Hopefully should be getting them back by next Wednesday. Left them in the fluid as theres one or two still a little rusty.

Kitchen beginning to get a little crowded.
williamsclio1- Posts : 34
Join date : 2009-12-10
Re: Ford Racing Puma - Underbody Restoration
![]() williamsclio1 Thu Dec 10, 2009 1:45 am
williamsclio1 Thu Dec 10, 2009 1:45 am
Treated the rusted areas with the Hammerite rust gel last night and after inspected this morning it seems to have lifted some of the surface rust but nothing to major most areas will still require a good going over with the wire brush.
So far this morning spent a good hour with a tough brush giving the drivers side arch a really good scrub down ready for stone chip etc. No pictures as not much to show.
Started masking taping up some of the underside in preparation for the spraying of zinc primer, epoxy mastic 121 and imperial blue paint. As you can see haven’t finished yet came in to watch the football.

Before the masking I made a start on the drivers side sill, decided to buy some grey zinc primer to apply to areas that I do to stop rust coming back before I get chance to treat the whole underside with the epoxy mastic 121 product.
This area so far has taken me a few hours, not expecting the other areas to take as long as this is the worst section.
Before:

After:


Would note that I had removed the rest of the rusty orange patches before spraying
David
williamsclio1- Posts : 34
Join date : 2009-12-10
Re: Ford Racing Puma - Underbody Restoration
![]() williamsclio1 Thu Dec 10, 2009 1:46 am
williamsclio1 Thu Dec 10, 2009 1:46 am
Early hours of this morning decided to get the front of the car up on the ramps so that I could raise the rear axles to gain better access to the underside of the car. Took around an hour to get it to the required height as we had to raise each corner one axle height at a time and try to shift the front of the car more central in the garage so I could get the front wheel off when it was in the air, as you can imagine this wasn’t by any means easy however in the end we got it up and removed the front two wheels.
As you can see not a lot of remove either side but just enough to walk down.


Only had a few hours today but managed to clean up the front wheels and use some wheel sealant:
Used G101 multi purpose cleaner and then red cheery wheel cleaner with megs brush and brushes


Now stored in the garage with the other two.

After being told that the mastic 121 product is best applied to bare stripped metal I will now remove the rust / paint and leave untreated until the epoxy mastic 121 arrives. (Thanks for pointing that out CosKev)
David
williamsclio1- Posts : 34
Join date : 2009-12-10
Re: Ford Racing Puma - Underbody Restoration
![]() williamsclio1 Thu Dec 10, 2009 1:47 am
williamsclio1 Thu Dec 10, 2009 1:47 am
Busy ish day today, removed the rear brake pads from the Hammerite Rust remover bucket
Before:

After:


Loaded the freshly painted callipers and pads in to the ruck sack and walked down to friend’s garage. Used the correct calliper piston tool to push the piston back in.

Calliper back home situated on the disc, looking pretty good if I say so myself. You can see few more hours done on the exhaust, finally getting there however as you can see still some bits to finish off and the centre section to make a start on.


Decided to see if I could remove the ABS sensor on the rear beam without it breaking as a replacement one is £118 + vat. As mentioned before they usually brake when removing so a gently gently approach was used.
Sprayed plenty of WD40 on to the sensor and bolts. Bolts were on tight but managed to get them off after plenty of elbow, as for the sensor they were in tight, used a 8mm and 10mm socket and lined it up on the edges of the sensor and gently tapped away with a hammer. Sensor finally came loose


Unfortunately there has been some minor dents on the tops of the sensors, only minor but after speaking to my mate (mechanic) he reckons there pretty sensitive so may not work, says once its back on the car I’ll be able to tell straight away as the warning light will show on the dash if its faulty.


Is there anyone else here that has any knowledge on this, does this look as though it might be to damage to be ok still, obviously hoping it’ll be ok as £118 is a lot of money for something that was original ok
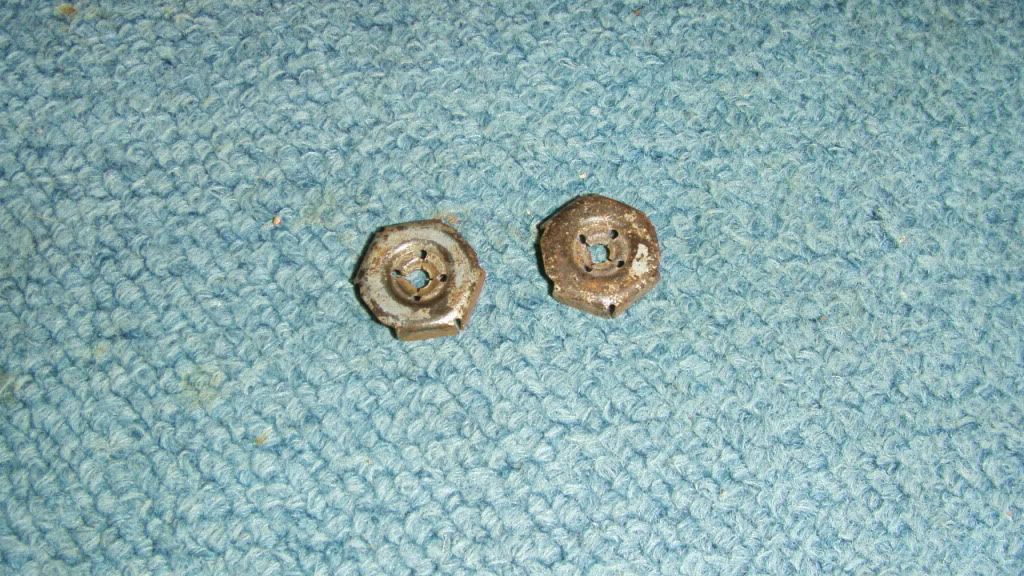
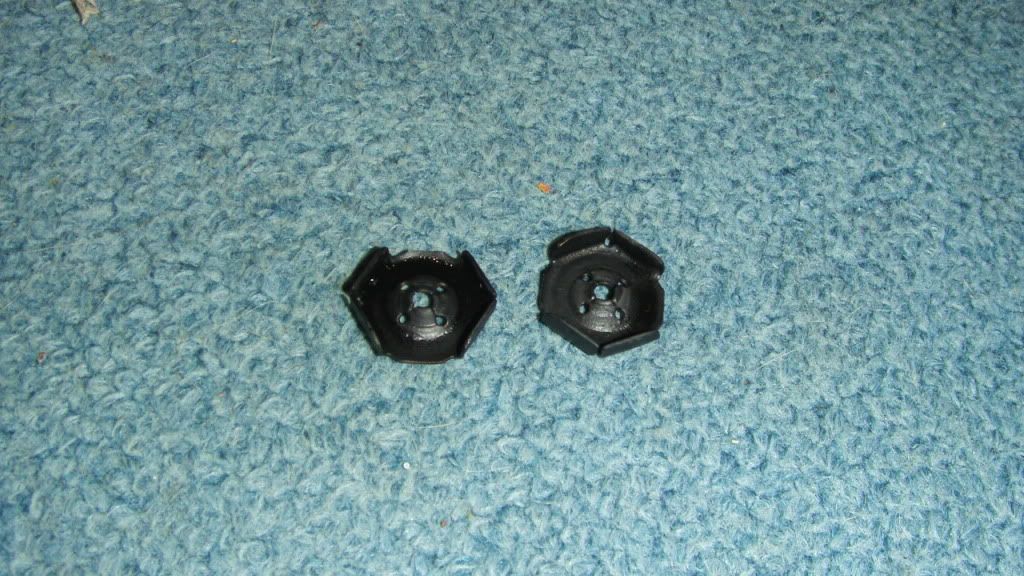
This evening I’ve cleaned up the rear ABS loop, suspension piston covers and rear bushes.
Before:
After:


Before:

After:

Keep them comments coming
David
williamsclio1- Posts : 34
Join date : 2009-12-10
Re: Ford Racing Puma - Underbody Restoration
![]() dunny Thu Dec 10, 2009 2:10 am
dunny Thu Dec 10, 2009 2:10 am
dunny- Posts : 49
Join date : 2009-10-20
Re: Ford Racing Puma - Underbody Restoration
![]() williamsclio1 Thu Dec 10, 2009 10:09 pm
williamsclio1 Thu Dec 10, 2009 10:09 pm
David
williamsclio1- Posts : 34
Join date : 2009-12-10
Page 1 of 2 • 1, 2 ![]()
|
|
|